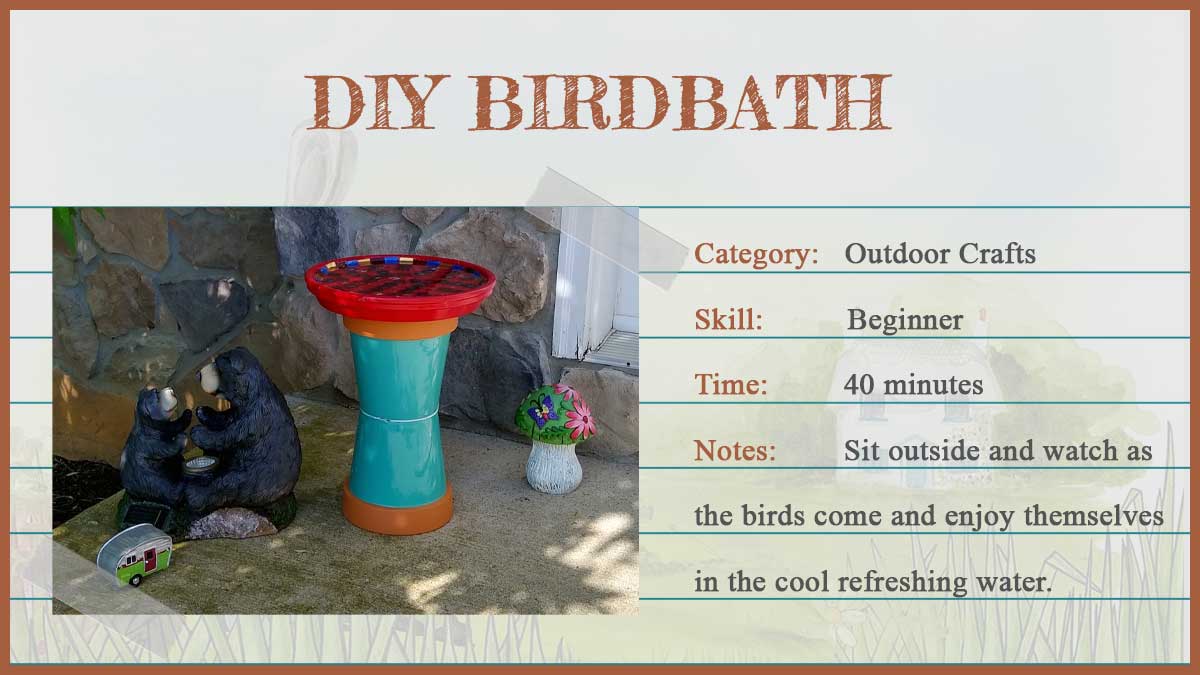
DIY Birdbath
This DIY Birdbath was one of my favorite projects to enjoy with my kids. We will sit outside on the back porch and watch as the birds come and enjoy themselves in the cool refreshing water.
Get creative with this one. You can use just about anything you want to make your birdbath. You can browse the isles of the dollar tree or craft store clearance to create a beautiful masterpiece for your favorite outdoor space.
DIY Birdbath Supply List
- Empty planting Pots (However many you choose)
- Planter Saucer or anything that can be used to hold water for your birdbath
- Assorted stones of your choice
- Liquid Nails
- Grout
- Grout Sealer

Step One
I used empty planting pots of different sizes so that I could stack them on top of one another to give my birdbath height.
I then used chalk paint and painted each of the pots as well as my planter saucer.
After my pots and saucer were dry I to sandpaper and lightly sanded several areas to give it a more rustic look to them.
Note: you can apply however many layers of paint to your pots as you would like. This is all personal preference.


Step Two
I purchased assorted stones from the dollar store, but you can use whatever you would like. Feel free to get creative with this. I have even seen people use shattered CD’s to give the bottom on their saucer a shiny appearance.
Use the liquid nails to glue each of your pieces to your planter saucer. Allow the glue to dry for 24 to 48 hours before proceeding to the next step.
Step Three
After your glue is dry you will use grout to fill in the gaps between your stones.
Note: If you purchase the premixed grout you need to also purchase a grout sealer so that you can keep the moisture out of your grout that you are using to fill in the gaps.
Be sure to read directions of the grout to confirm if you need the sealer.
Apply the grout to the bottom of your saucer making sure that you are filling in all the gaps. Gently wipe away any excess grout from the stones. Allow this to dry according to the directions on the container.
After the grout is dry apply your grout sealer on the bottom of the saucer where you applied the grout. Allow this to dry according to the directions on the container as well.


Step Four
After your saucer is completed you will want to apply this to the top of your stand.
Now I chose to use several sizes of planting pots to stack on top of one another for the stand of my bird feeder.
I turned the pots upside down to allow the larger opening to sit on the ground as a base. Then I stacked my pots according to size.
As I stacked my pots on top of one another I used the liquid nails to glue them together.
On the top, I glued my saucer and added water.
Now all you have to do is sit and wait for the birds to come.

For Your Personal DIY Book
Use the printable layout to add this project to your personal DIY Manual.
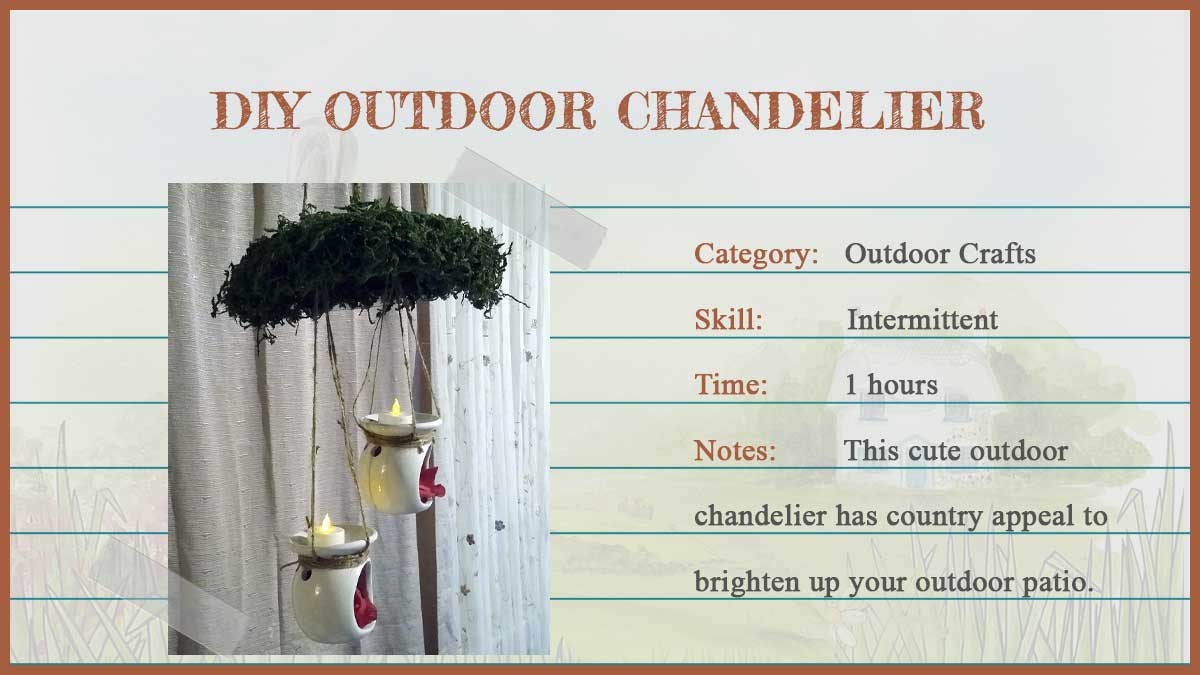
DIY Hanging Birdbath
This birdbath was one of my favorite projects to enjoy with my kids. We will sit outside on the back porch and watch as the birds come and enjoy themselves in the cool refreshing water.
- Empty planting Pots (However many you choose)
- Planter Saucer (Anything that can be used to hold water for your birdbath)
- Assorted stones (Your choice)
- Liquid Nails
- Grout
- Grout Sealer
Step One
- I used empty planting pots of different sizes so that I could stack them on top of one another to give my birdbath height.
- I then used chalk paint and painted each of the pots as well as my planter saucer.
- After my pots and saucer were dry I to sandpaper and lightly sanded several areas to give it a more rustic look to them.
- Note: you can apply however many layers of paint to your pots as you would like. This is all personal preference.
Step Two
- I purchased assorted stones from the dollar store, but you can use whatever you would like. Feel free to get creative with this. I have even seen people use shattered CD’s to give the bottom on their saucer a shiny appearance.
- Use the liquid nails to glue each of your pieces to your planter saucer. Allow the glue to dry for 24 to 48 hours before proceeding to the next step.
Step Three
- After your glue is dry you will use grout to fill in the gaps between your stones.
- Note: If you purchase the premixed grout you need to also purchase a grout sealer so that you can keep the moisture out of your grout that you are using to fill in the gaps.
- Be sure to read directions of the grout to confirm if you need the sealer.
- Apply the grout to the bottom of your saucer making sure that you are filling in all the gaps. Gently wipe away any excess grout from the stones. Allow this to dry according to the directions on the container.
- After the grout is dry apply your grout sealer on the bottom of the saucer where you applied the grout. Allow this to dry according to the directions on the container as well.
Step Four
- After your saucer is completed you will want to apply this to the top of your stand.
- Now I chose to use several sizes of planting pots to stack on top of one another for the stand of my bird feeder.
- I turned the pots upside down to allow the larger opening to sit on the ground as a base. Then I stacked my pots according to size.
- As I stacked my pots on top of one another I used the liquid nails to glue them together.
- On the top, I glued my saucer and added water.
- Now all you have to do is sit and wait for the birds to come.
Get creative with this one. You can use just about anything you want to make your birdbath. You can browse the isles of the dollar tree or craft store clearance to create a beautiful masterpiece for your favorite outdoor space.
Related Posts
Post a Comment
You must be logged in to post a comment.